Troubleshooting (Windows)
Warning
This section applies to Windows only.
Missing Image or Binary
This issue might happen to compressed image archive in .zip or .tar.gz format.
You might encounter the following error on Windows after executing genio-flash:
Traceback (most recent call last):
...
with open(f"{path}/{name}-{machine}.testdata.json", 'r') as fp:
FileNotFoundError: [Errno 2] No such file or directory: './rity-demo-image-genio-350-evk.testdata.json'
This is usually caused by incompletely extracted file archives. In this case, try the following:
Rename the image archive to a short name, such as
image.tar.gz.Extract the images to root directory, such as
D:\\on Windows.
Missing “Yocto” Device Driver
If you are connecting the board and switching it to Download Mode for the first time, you might find that
There is an unrecognized
Yoctodevice, andgenio-flashkeeps waiting for the device afterJumping to bootstrap:
genio-flash
Genio Tools: v1.4
Yocto Image:
name: Rity Demo Image (rity-demo-image)
distro: Rity Demo Layer 25.0-dev (rity-demo)
codename: scarthgap
machine: genio-1200-evk
overlays: ['video.dtbo', 'gpu-mali.dtbo']
Looking for MediaTek SoC matching USB device 0e8d:0003
Opening COM14 using baudate=115200
Connected to MediaTek MT8168 SoC
Sending bootstrap to address: 0x201000
Jumping to bootstrap at address 0x201000 in AArch64 mode
erasing mmc0
< waiting for any device >
This is likely caused by an unrecognized device driver. To confirm if this is exactly the issue:
Press
Windows+Rand typedevmgmt.mscthen pressENTER.Check the Device Manager dialog and see if it has a Other devices > Yocto device that is not recognized:
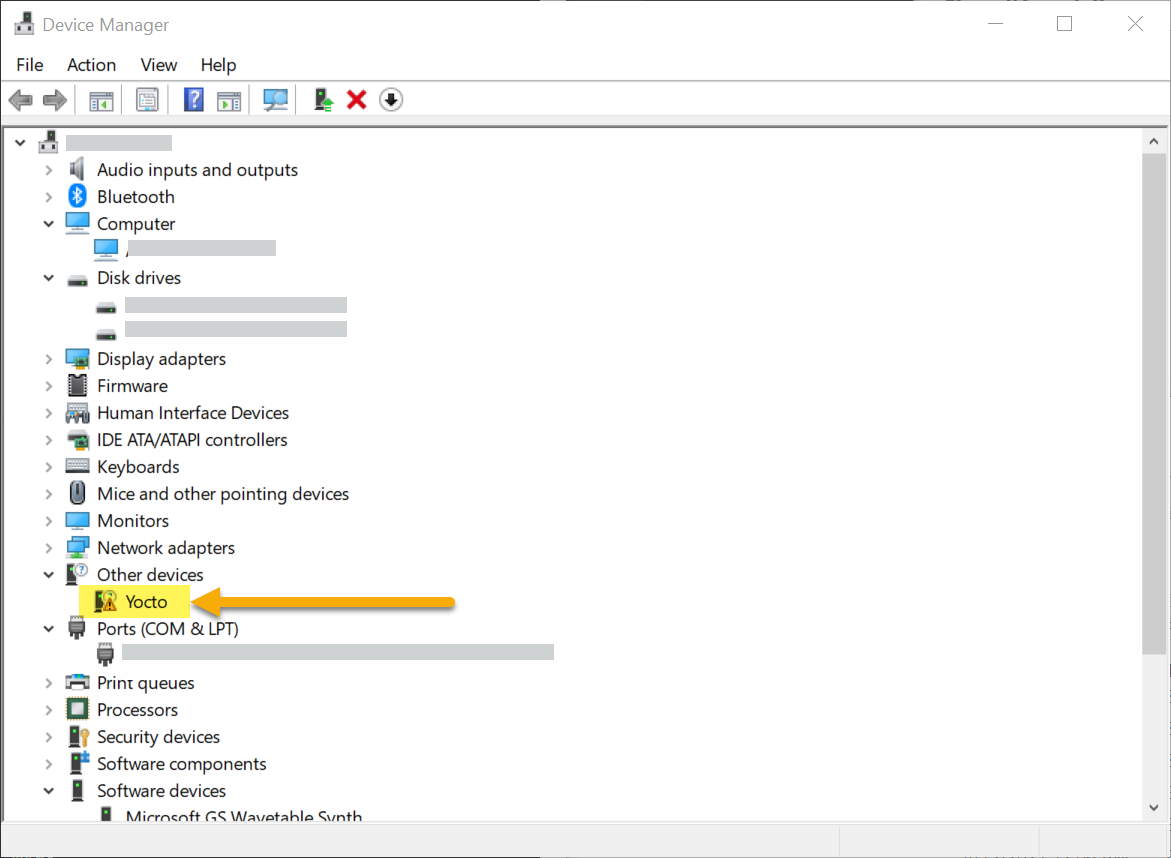
Unrecognized “Yocto” device in Windows Device Manager
To install driver for the unrecognized device, please follow steps below:
Right-click on the Yocto device, and select Update Driver Software.
Click Browse my computer for driver software.
Click Let me pick from a list of device drivers on my computer.
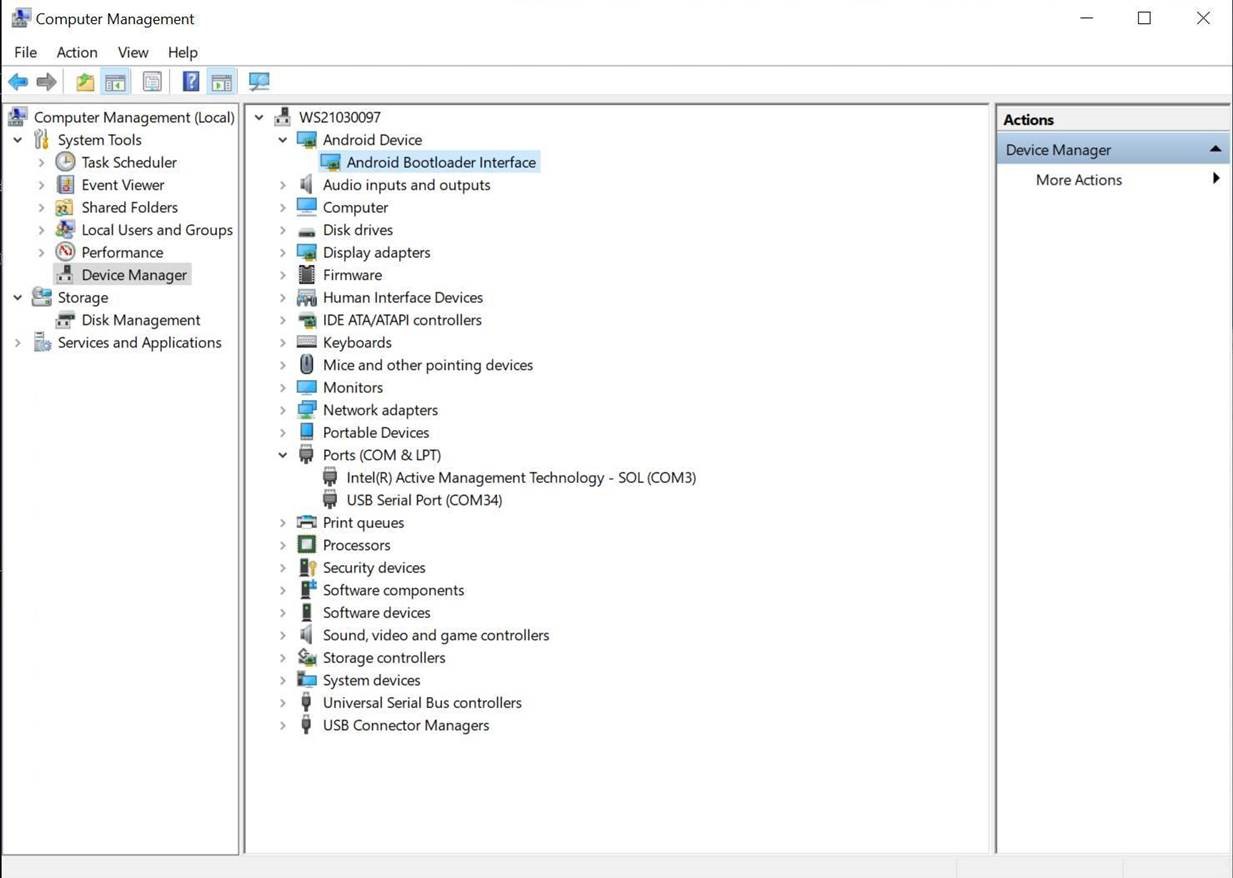
Choose Android Device.
Choose Android Bootloader Interface.
Click Yes if a “Update Driver Warning” dialog pops.
After updating the Android Bootloader Interface driver, genio-flash should be able to detect the device and start the flashing procedure.
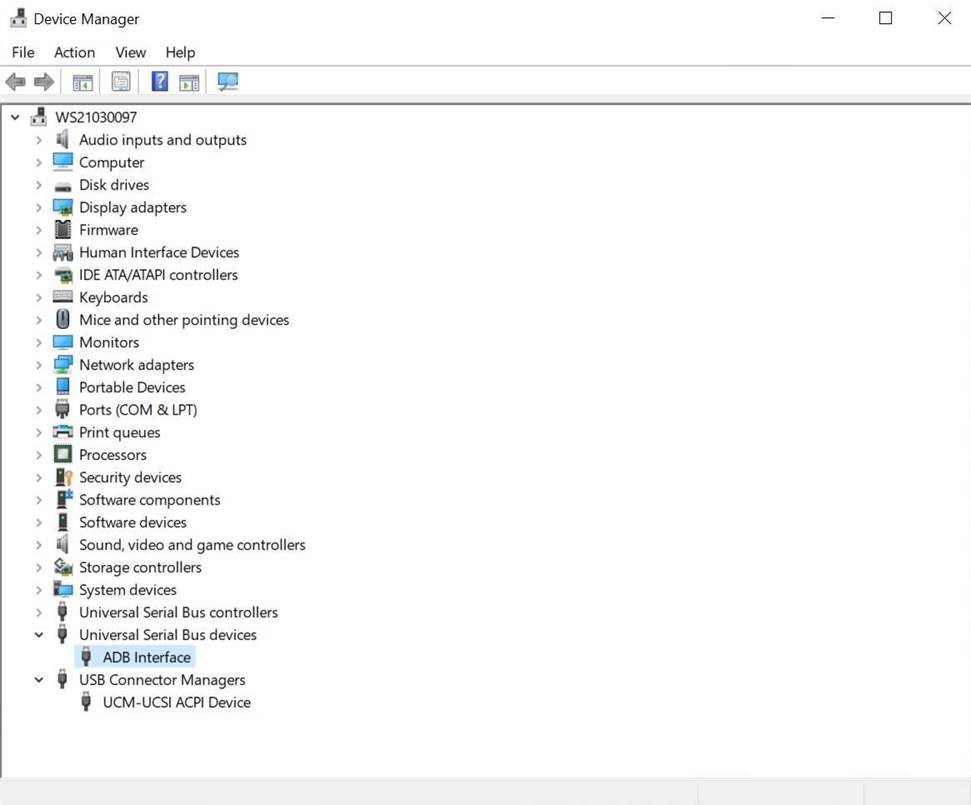
Windows Device Drivers
Different ports on Genio EVK require different Windows drivers when connected to your windows host PC. Here is a list of the drivers and the corresponding location in the Windows Device Manager:
UART-to-USB-Serial
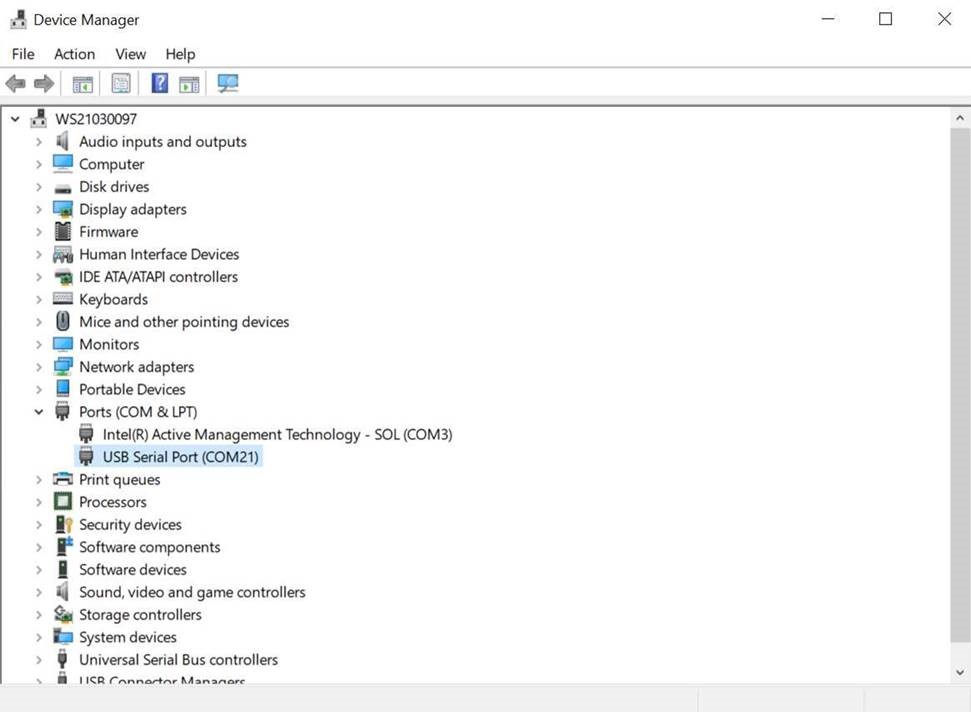
FastBoot (for genio-flash)
RNDIS (After boot into Yocto and connected to Windows via USB port)
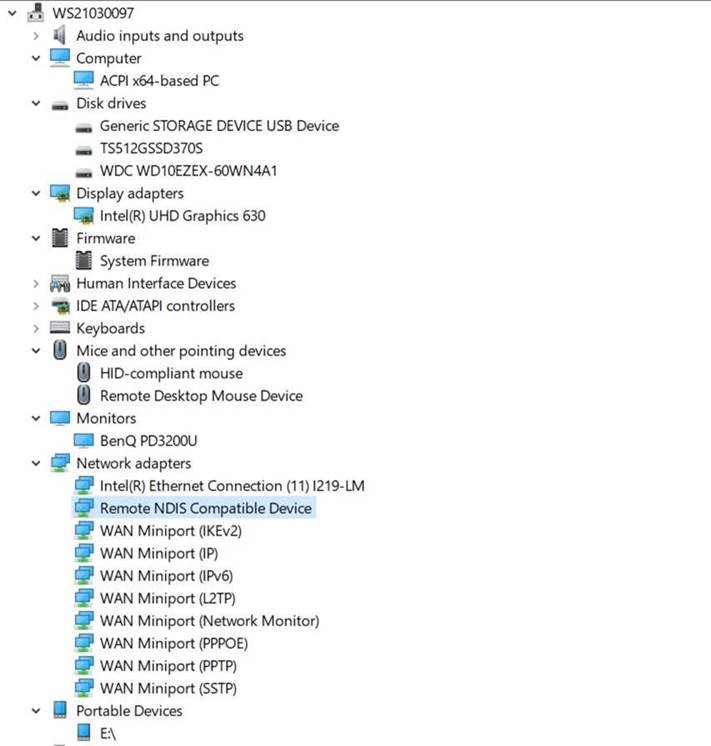
ADB (After boot into Yocto and connected to Windows via USB port)
Flash Process Paused
You might find that the flashing process is “paused” during writing operation:
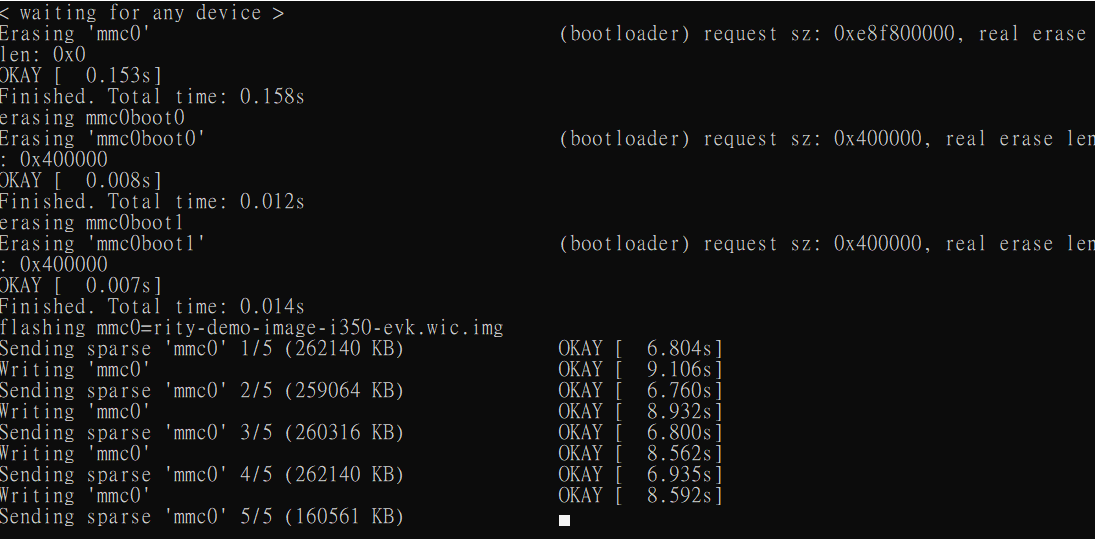
And the flash process can be resumed by pressing ENTER in the console window.
To remedy this problem, please follow these steps:
Click the console icon in the upper-left corner of the console window, and select Defaults
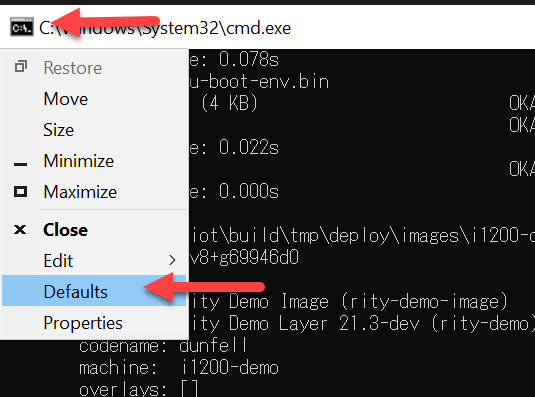
In the Console Window Properties window:
Click Options tab.
Uncheck QuickEdit Mode in Edit Options
Click OK

This should prevent the flashing process being paused in the future console sessions.
Genio Tools Crash When Programming FTDI
Depending on your EVK board and FTDI driver version, the program-ftdi
command of the genio-board tool may crash on Windows.
For example, the command:
genio-board -s B001I4X2 program-ftdi --set-serial DUT0001
may crash in the FTDI driver DLL with the following error:
ERROR:aiot:exception: access violation reading 0x0000027CC3E24079
You can remedy this issue by reprogramming the FTDI chip of the UART0 port using the official FTDI FTProg tool.
To do so, follow these steps:
Visit https://ftdichip.com/ to download the FT_PROG tool, and install it on your host PC.
Connect the EVK’s UART0 port to the host PC.
Terminate any terminal applications connected to the UART0 port of the EVK.
In the FT_Prog application, click the EEPROM tab.
Select the DEVICES menu and then select the Scan and Parse item.
The Device Tree window should now be populated with the chip information.
Select USB String Descriptors.
Uncheck Auto Generate Serial and update the Serial Number to the value you need. For example, in the command above, we want it to be
DUT0001: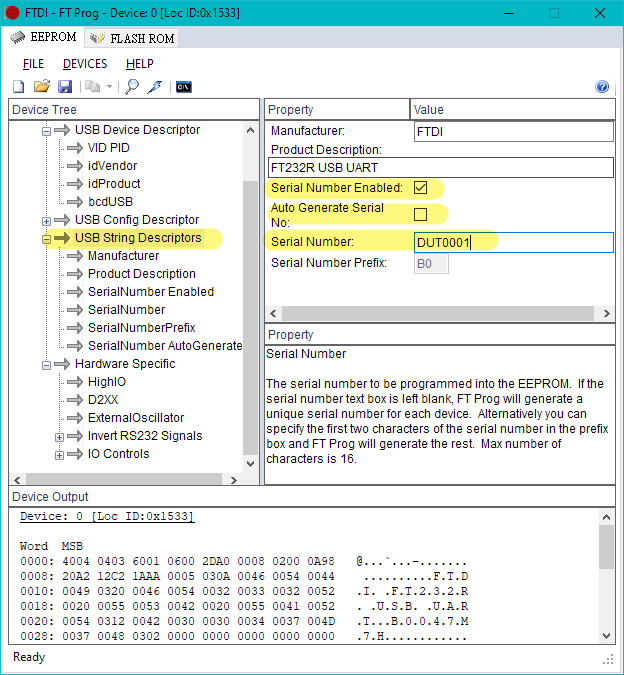
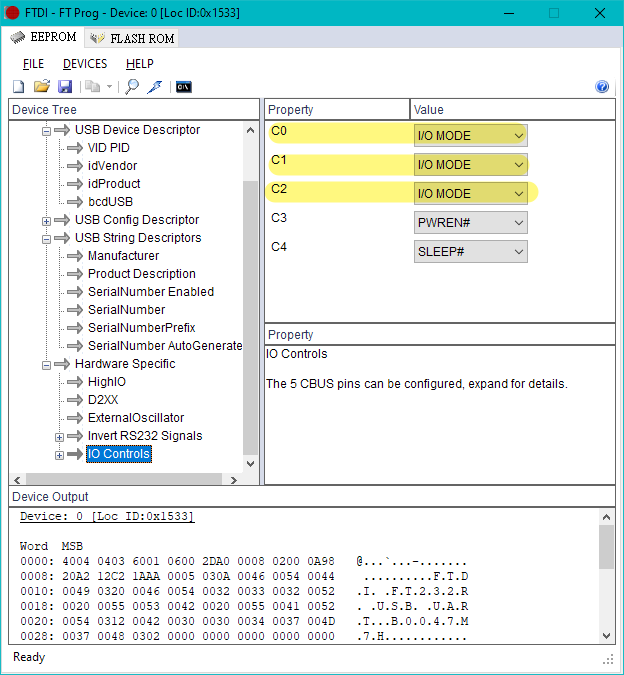
Select Hardware Specific and then IO Controls.
Make sure properties C0, C1, and C2 are set to I/O MODE:
Select the DEVICE menu and then click Program.
In the popup dialog, click Program.
Finally, close the FTProg application. You may now run genio-board program-ftdi
again and check if the crash issue has been resolved.