Flash Genio 510/700-EVK
This guide shows how to “flash”(write) the system image into the non-volatile flash memory of Genio 510-EVK and Genio 700-EVK. The flashing process is performed over a USB connection between the target board and the host computer containing the image.
In order to write the on-board storage with AIoT Tools, you need to set the SoC in download mode, which allows AIoT Tools to transfer a download agent binary to the SRAM of SoC. The download agent then provides a fastboot interface for subsequent image transfer and storage write operations.
Important
All the description shown in he are based on Genio 700-EVK. For Genio 510-EVK, users can follow the same step to flash the board with changing the naming term from 700 to 510.
Prerequisites
Prepare the following items:
A Linux or Windows host PC with AIoT Tools installed
Genio 510/700-EVK and its 12V Power Adapter
a Micro USB cable for downloading images to on-board storage
Step 1. Connect board to host PC
Warning
Make sure you are using the accompanied 12V power adapter for Genio 510/700-EVK. Using an adapter with different output voltage results in unstable system and could damage your board.
Plug the 12V power jack to the DC JACK IN port. Once connected to power source, the Power LED and System on LED should light up, as shown below:
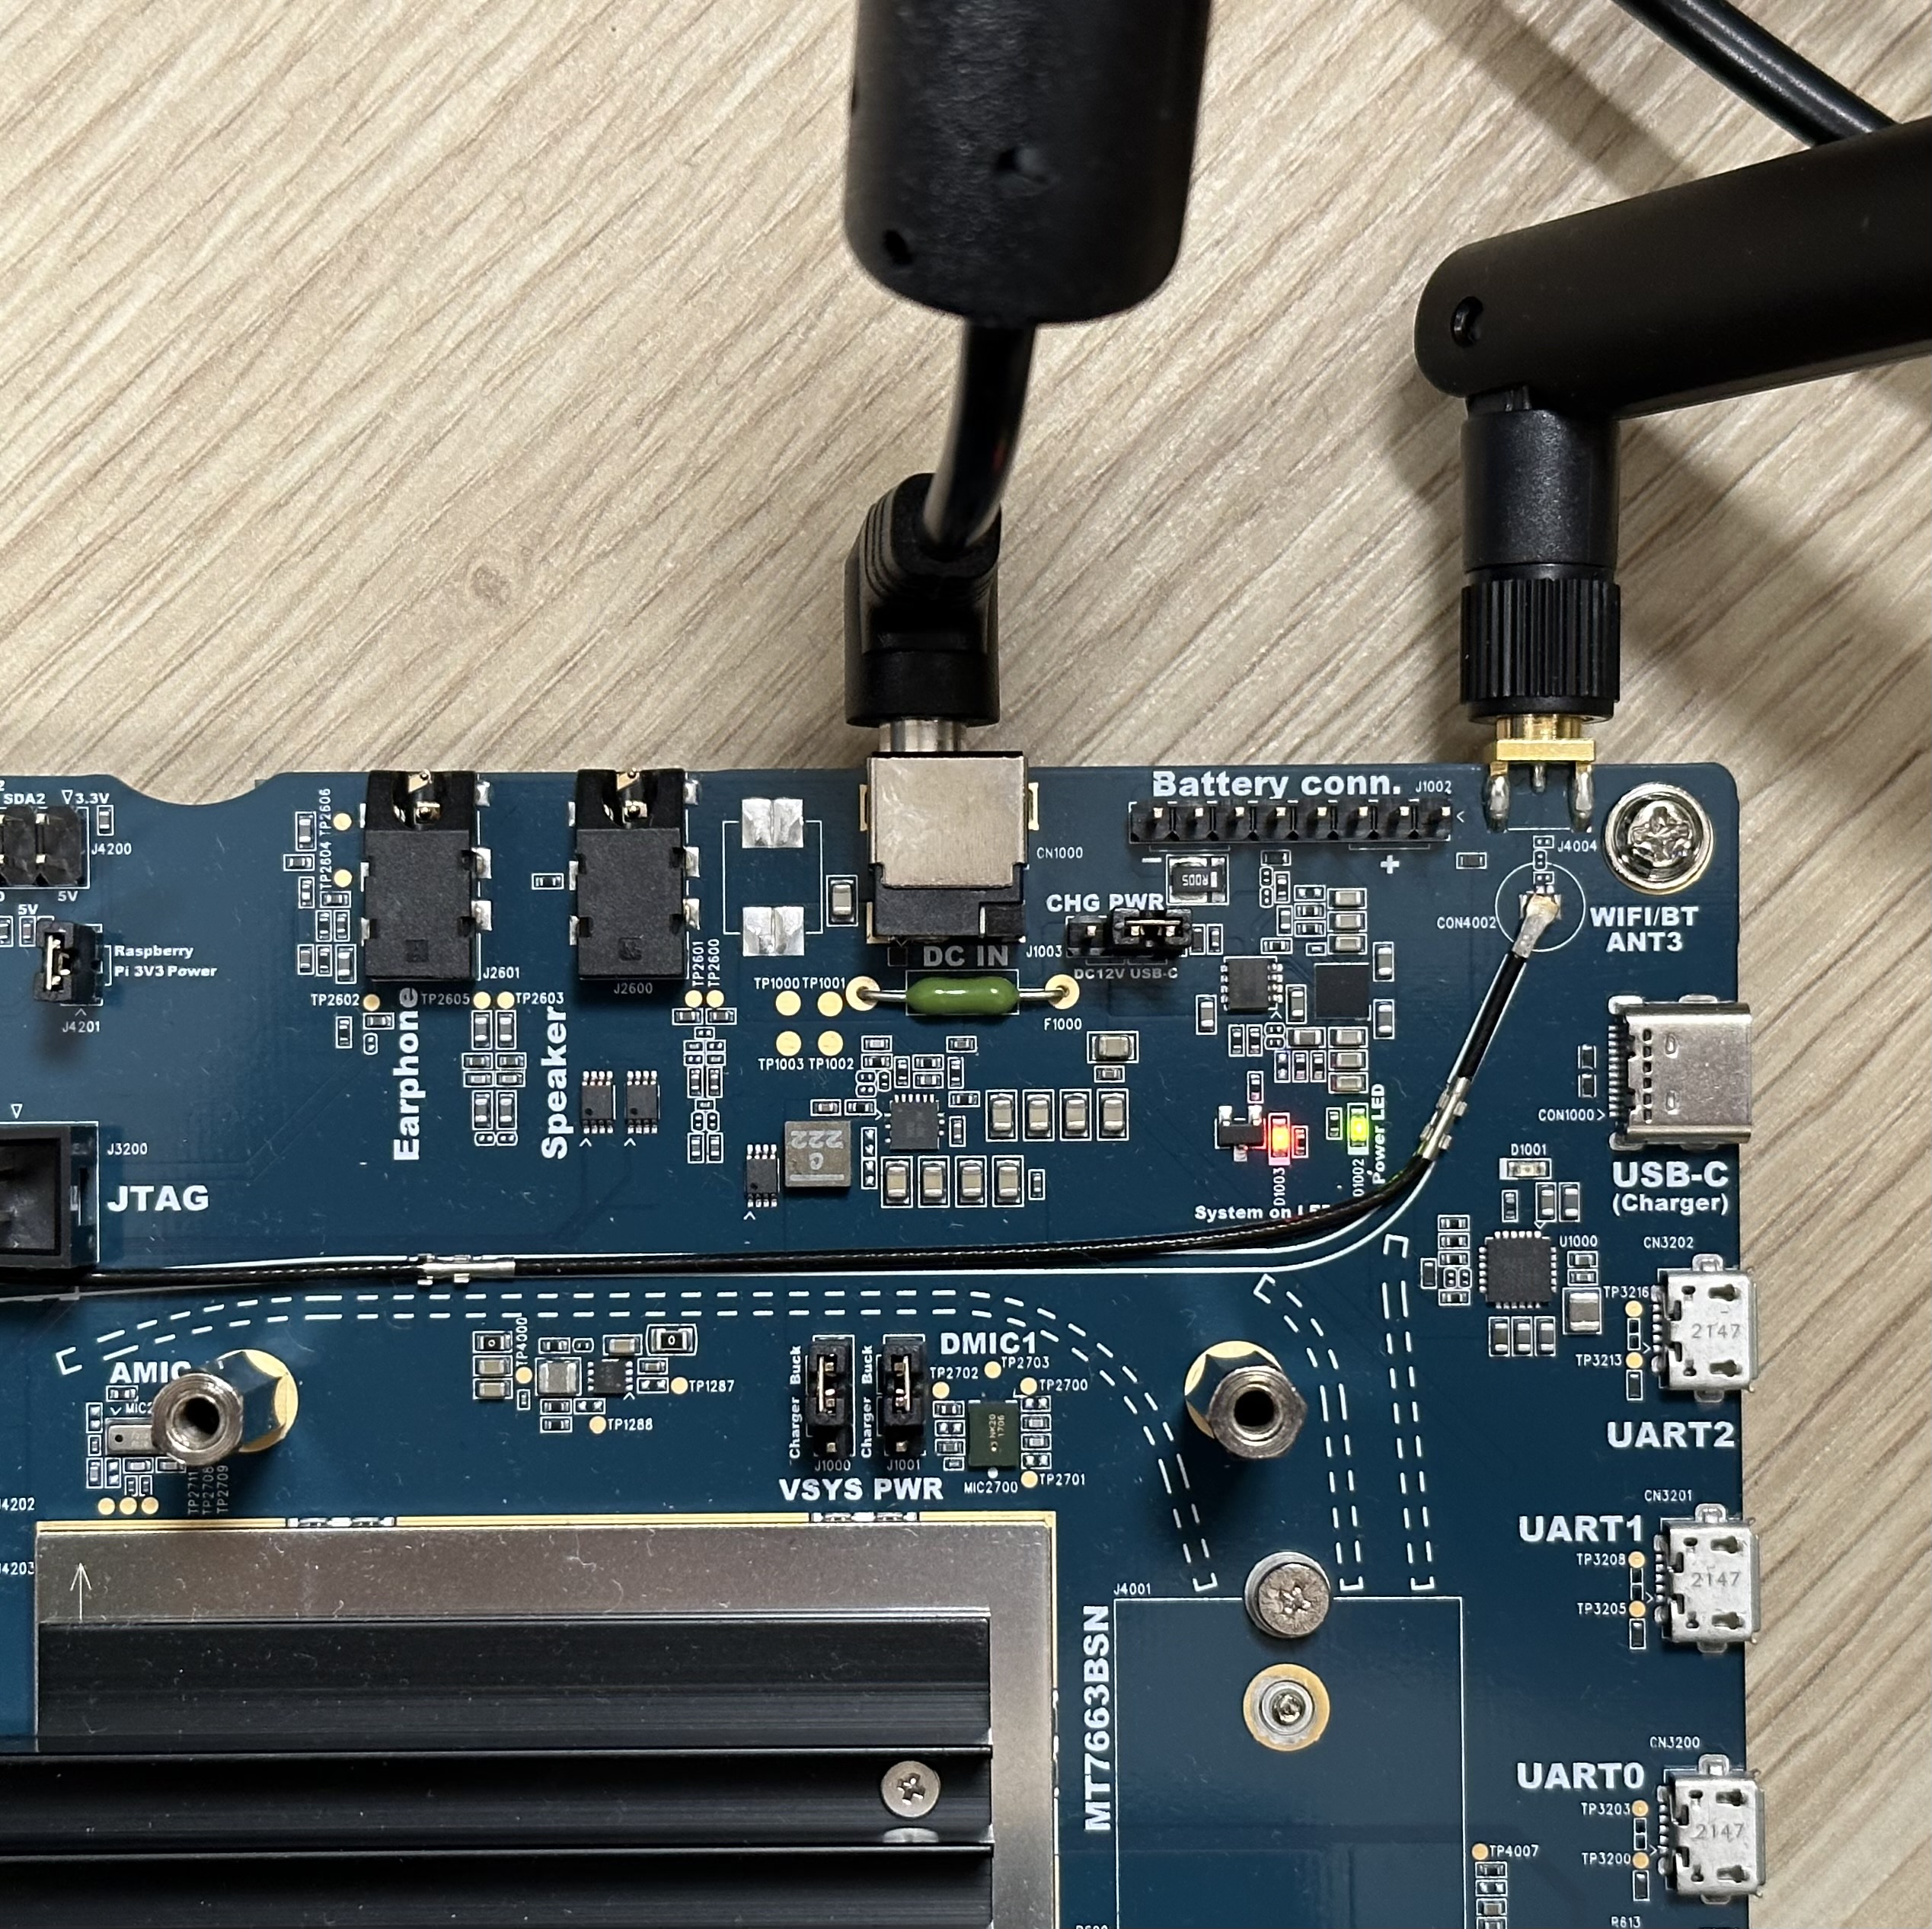
Find the Micro USB D/L port (micro USB) on Genio 510/700-EVK, and connect it to host PC with a micro USB cable:
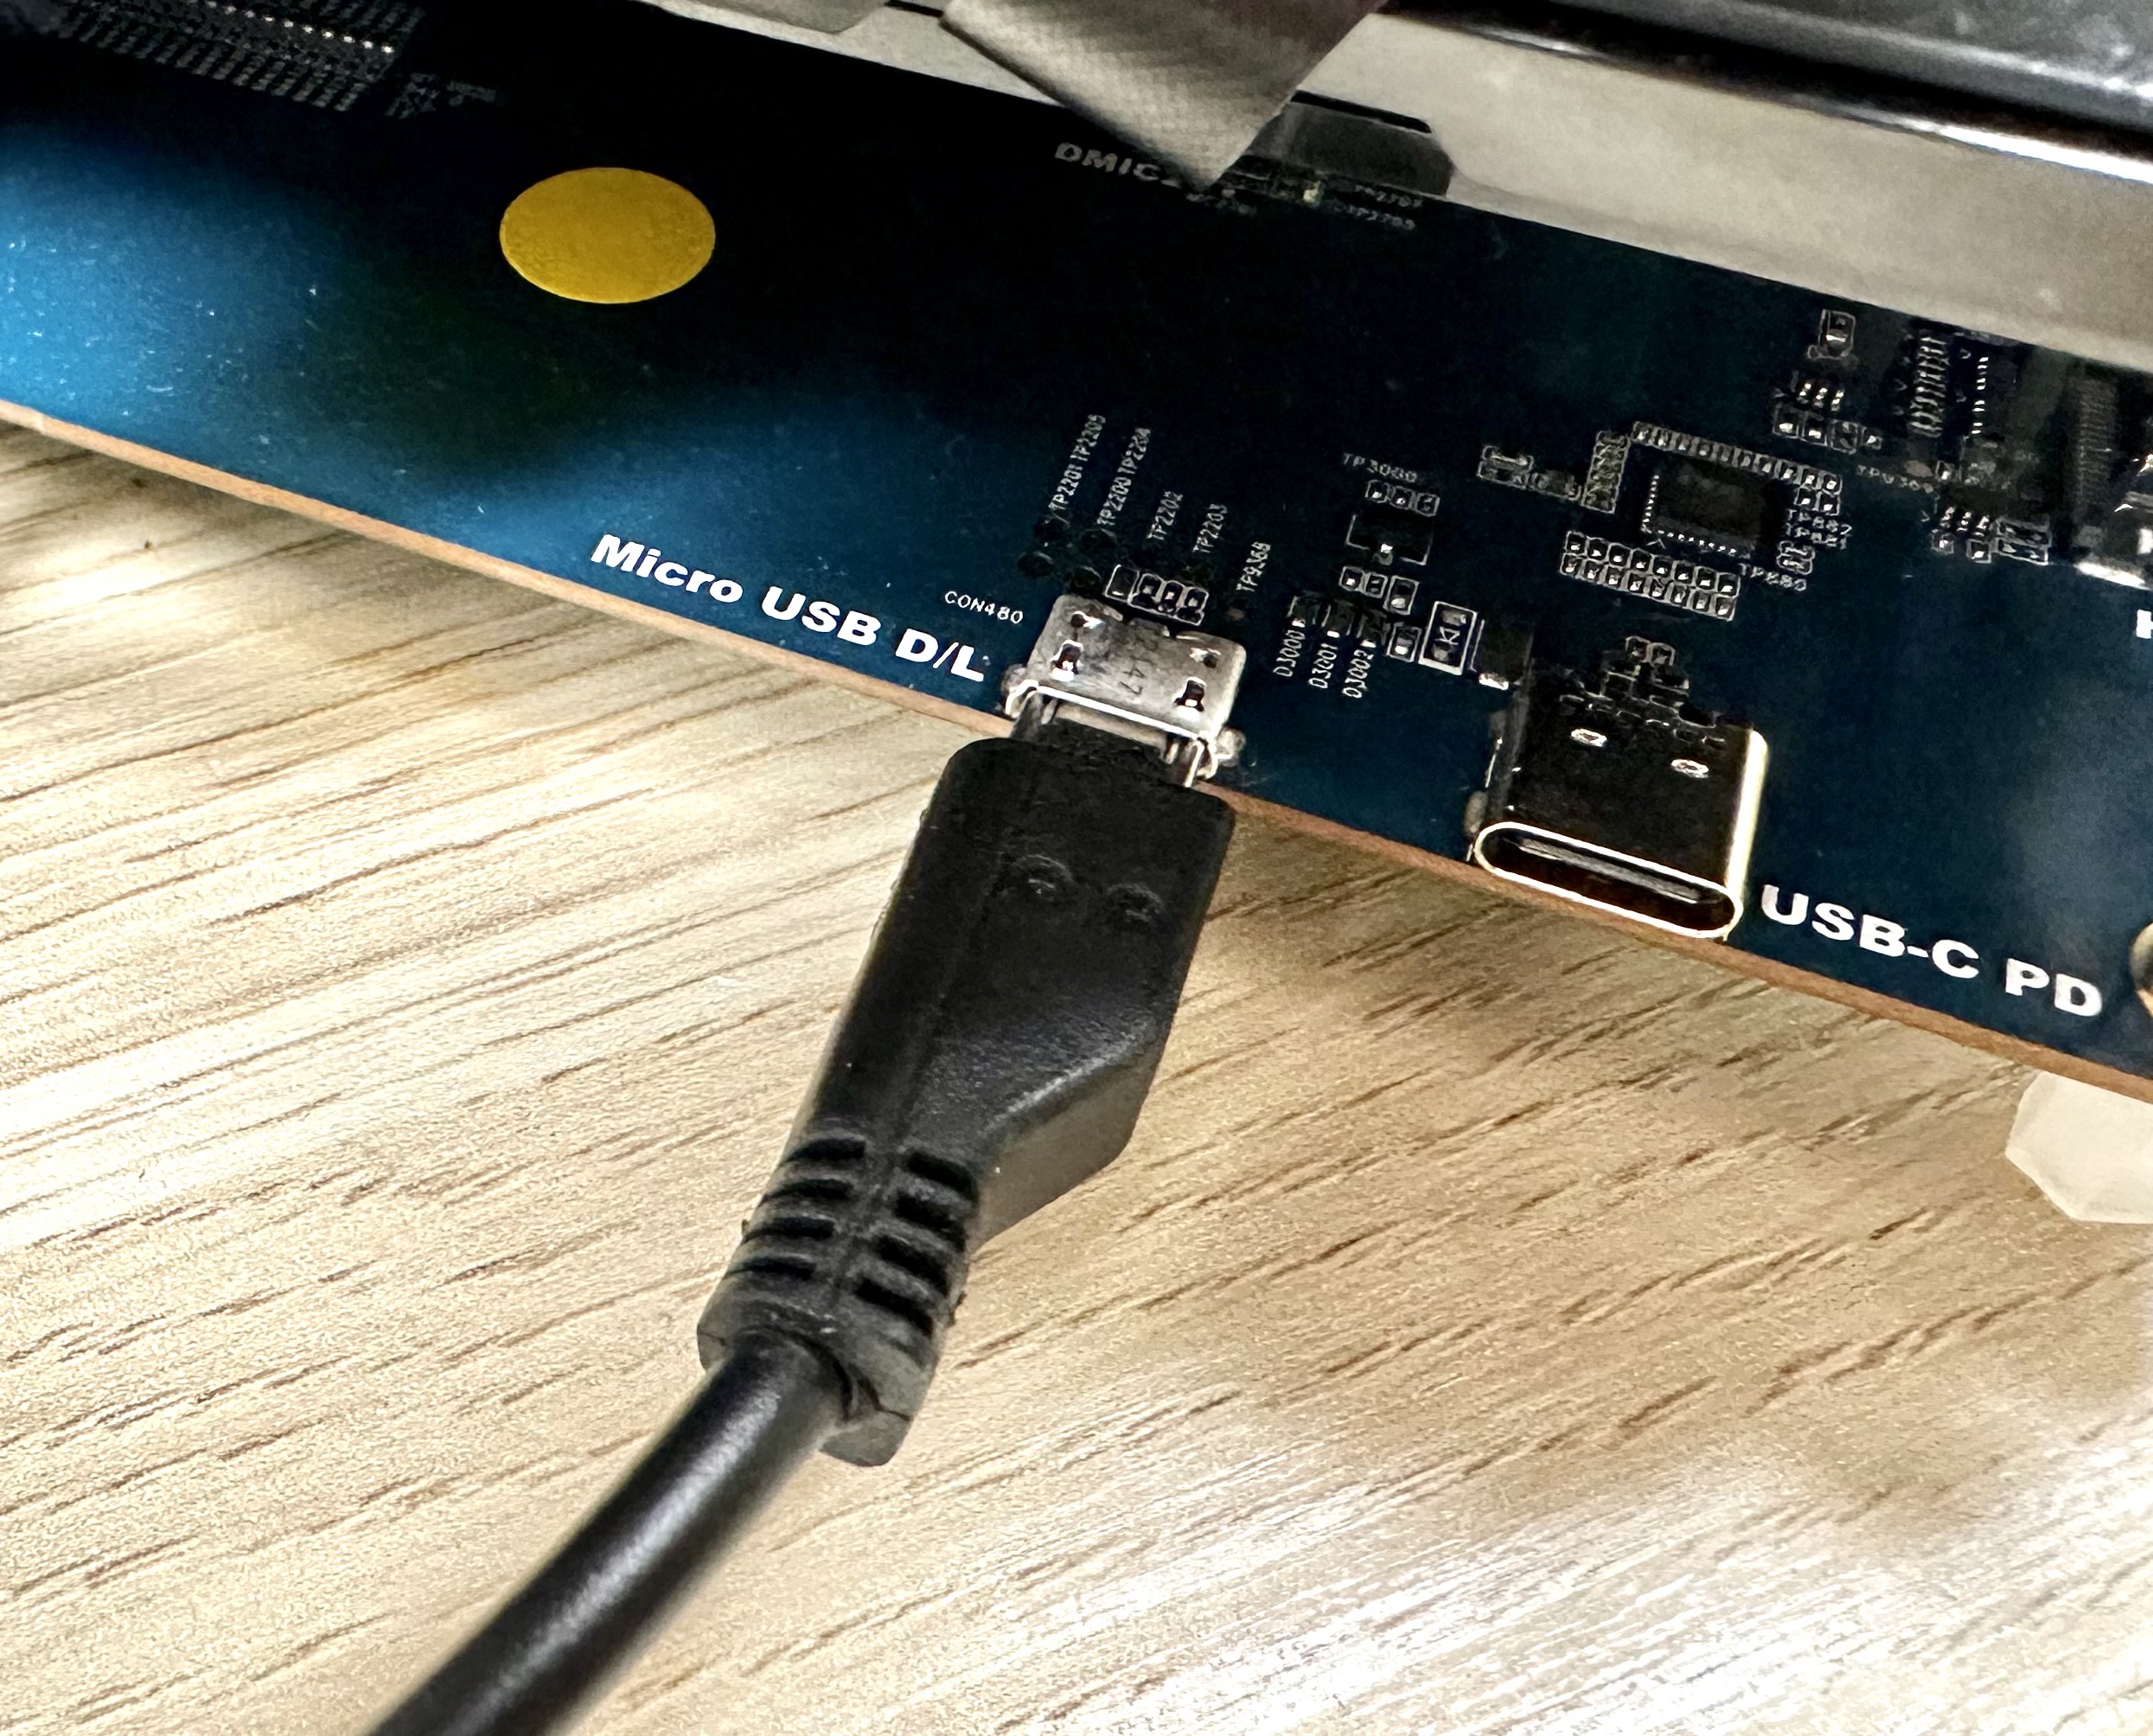
Make sure you connect to the Micro USB D/L port of the board, rather than the USB-C USB-C PD port. USB download only works on the Micro USB D/L port.
Note
The EVK board would power on when the Micro USB D/L port is connected, regardless of the state of the auto power on jumper pin J3001.
Step 2. Launch genio-flash Tool
Change working directory to the image directory.
If you built rity-demo-image from source, the image is default in:
cd $BUILD_DIR/tmp/deploy/images/genio-700-evk
If you are using a pre-built image, please change to the directory that
you’ve extracted the pre-built image. It should contain a partitions.json file.
After switching into the image directory, run following command:
genio-flash --load-dtbo gpu-mali.dtbo --load-dtbo apusys.dtbo --load-dtbo video.dtbo
By default genio-flash will use the prefix rity-demo-image to search for files under image directory.
If you are building other images, use -i option to specify different prefix. For example:
cd $BUILD_DIR/tmp/deploy/images/genio-700-evk
genio-flash -i rity-bringup-image --load-dtbo gpu-mali.dtbo --load-dtbo apusys.dtbo --load-dtbo video.dtbo
Note
Make sure you load the gpu-mali.dtbo, apusys.dtbo, and video.dtbo.
GPU, APU and video codec does not work if you omitting these overlays.
genio-flash should print logs to the terminal similar to this:
AIoT Tools: <tool-version>
Yocto Image:
        name:     Rity Demo Image (rity-demo-image)
        distro:   Rity Demo Layer <iot-yocto-version> (rity-demo)
        codename: kirkstone
        machine:  genio-700-evk
        overlays: ['gpu-mali.dtbo', 'apusys.dtbo', 'video.dtbo']

Looking for MediaTek SoC matching USB device 0e8d:0003
The <tool-version> and <iot-yocto-version> strings change according to the tool version and IoT Yocto version.
Once you see line Looking for MediaTek SoC matching USB device 0e8d:0003 prompt, proceed to the next step.
Step 3. Enter Download Mode
Locate the push buttons on the board:
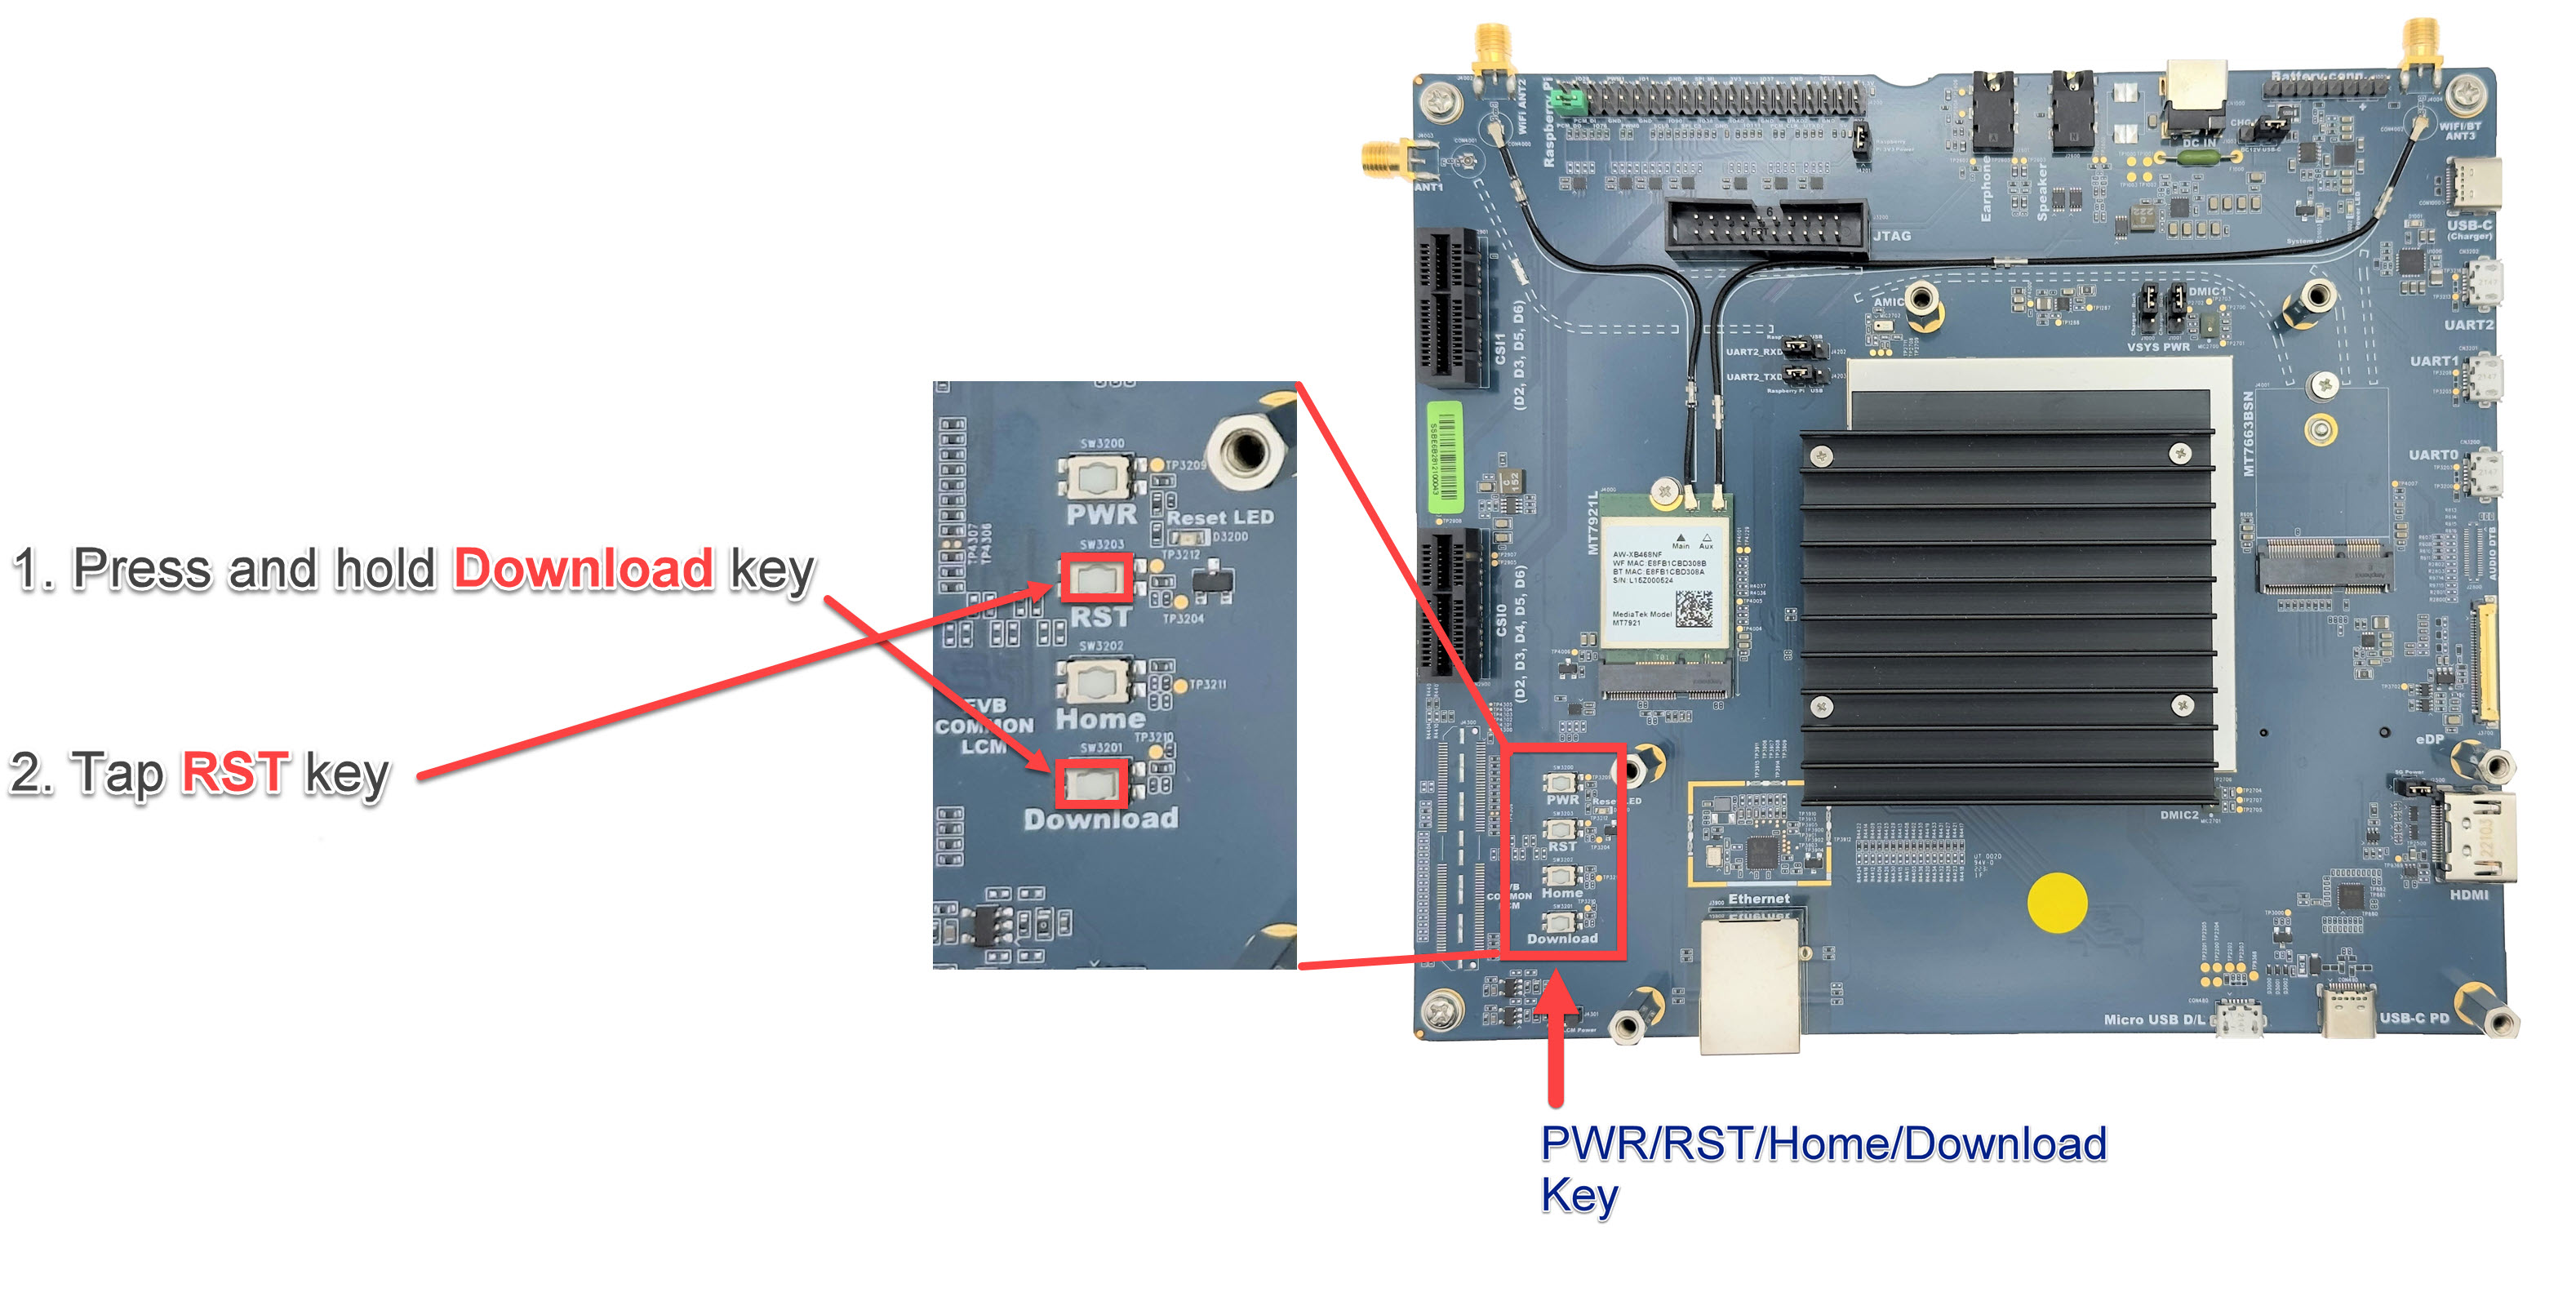
Follow these steps to enter download mode:
Press and keep pressing the Download button.
Press and release the RST button.
Hold the Download button until you see the log
Erasing 'mmc0'message, as shown below:Looking for MediaTek SoC matching USB device 0e8d:0003 Opening COM33 using baudate=115200 Connected to MediaTek MT8188 SoC Sending bootstrap to address: 0x201000 Jumping to bootstrap at address 0x201000 in AArch64 mode erasing mmc0 < waiting for any device > Erasing 'mmc0' (bootloader) request sz: 0xe8f800000, real erase len: 0x0 OKAY [ 1.046s]
and then you can release the Download button.