Install Video Hardware Packages
This page shows you how to install the User space daemons and firmware for Genio SoC hardware video codec and video format conversion hardware.
Important
Make sure you’ve added Genio package PPA to your board before continuing.
User Space Services
For all Genio EVKs, install the vpud user space daemon. This daemon is required to drive the hardware video codec.
Please install the respective package according to the SoC platform:
# Genio 350
sudo apt install mediatek-vpud-genio350
# Genio 510
sudo apt install mediatek-vpud-genio510
# Genio 700
sudo apt install mediatek-vpud-genio700
# Genio 1200
sudo apt install mediatek-vpud-genio1200
Important
You must install different vpud-genio packages for each platform.
Incorrect installation breaks the video codec driver.
For Genio 350, and only on Genio 350, an additional daemon must be installed:
# Only run this if you are using Genio 350
sudo apt install mediatek-mdpd-genio350
Important
DO NOT install mediatek-mdpd-genio350 on Genio 510, Genio 700 or Genio 1200.
Genio 510/700 and Genio 1200 do not require mdpd for hardware video codec to work;
Installing mdpd on Genio 510/700 and Genio 1200 may cause compatibility issues.
After installing the user space services, reboot the system:
sudo reboot
GStreamer Installation
The GStreamer 1.20 in Ubuntu 22.04(Jammy) does not support certain hardware buffer formats used by the video codec hardware in Genio SoC.
Therefore, MediaTek backports a set of GStreamer patches to enable hardware video decoding using
GStreamer v4l2* plugins. To enable hardware video codec using GStreamer,
please install the patched GStreamer packages with the following steps:
# Please install them separately to make sure dependencies are correctly resolved.
sudo apt install gstreamer1.0-plugins-base

# Get patched "good" plugins
sudo apt install gstreamer1.0-plugins-good

# Get patched "bad" plugins
sudo apt install gstreamer1.0-plugins-bad

# Refresh GStreamer plug-in cache to make "gst-inspect-1.0" re-detect available elements.
sudo rm ~/.cache/gstreamer-1.0/registry.aarch64.bin
rm ~/.cache/gstreamer-1.0/registry.aarch64.bin
The installed GStreamer plugin packages should have the string +genio23 as part of the package version,
for example:
apt list | grep "gst.*plugins"
gstreamer1.0-plugins-bad/jammy,now 1.20.3+genio23.0-0genio1 arm64 [installed]
gstreamer1.0-plugins-base/jammy,now 1.20.1+genio23.1~pr2-0genio1 arm64 [installed]
gstreamer1.0-plugins-good/jammy,now 1.20.3+genio23.1~pr1-0genio1 arm64 [installed]
libgstreamer-plugins-bad1.0-0/jammy,now 1.20.3+genio23.0-0genio1 arm64 [installed]
libgstreamer-plugins-base1.0-0/jammy,now 1.20.1+genio23.1~pr2-0genio1 arm64 [installed]
libgstreamer-plugins-good1.0-0/jammy,now 1.20.3+genio23.1~pr1-0genio1 arm64 [installed]
...
We also recommend you to install the following packages to access multimedia features on Genio boards:
sudo apt install pulseaudio
sudo apt install pulseaudio-utils
sudo apt install gstreamer1.0-alsa
After installation, check if the hardware codecs are being detected. Notably, the following elements should exist:
v4l2convertv4l2h264encv4l2h265enc
On Genio 1200 EVK, the list looks like this:
gst-inspect-1.0 video4linux2 | grep -i v4l2
v4l2convert: V4L2 Video Converter
v4l2deviceprovider: Video (video4linux2) Device Provider
v4l2h264dec: V4L2 H264 Decoder
v4l2h264enc: V4L2 H.264 Encoder
v4l2h265dec: V4L2 H265 Decoder
v4l2h265enc: V4L2 H.265 Encoder
v4l2mpeg4dec: V4L2 MPEG4 Decoder
v4l2radio: Radio (video4linux2) Tuner
v4l2sink: Video (video4linux2) Sink
v4l2src: Video (video4linux2) Source
v4l2vp8dec: V4L2 VP8 Decoder
v4l2vp9dec: V4L2 VP9 Decoder

# The format "NV12_16L32S" should exist - this is the output format of HW video decoder.
gst-inspect-1.0 v4l2convert | grep -i NV12_16L32S
format: { (string)GRAY8, (string)RGB16, (string)RGB, (string)BGR, (string)BGRA, (string)ARGB, (string)UYVY, (string)YUY2, (string)YVYU, (string)YV12, (string)NV12_16L32S, (string)I422, (string)NV12, (string)NV21, (string)NV16, (string)NV61, (string)I420 }
Hardware Video Encoder Usage Example with GStreamer
The follow command is a quick video encoder example using gst-launch-1.0 tool:
gst-launch-1.0 -v videotestsrc num-buffers=300 ! "video/x-raw,format=NV12, width=720, height=480, framerate=30/1" ! \
  v4l2h264enc extra-controls="cid,video_gop_size=30,video_bitrate=512000,sequence_header_mode=1" ! \
  "video/x-h264,level=(string)4.1,profile=main" ! h264parse ! mp4mux ! \
  filesink location=/home/ubuntu/test-h264.mp4
This encodes a test pattern video to /home/ubuntu/test-h264.mp4.
Hardware Video Decoder Usage Example with GStreamer (Ubuntu Desktop)
For hardware video decoder, the following commands demonstrate video playback using the hardware decoder and send the frame data to the Wayland compositor for display:
sudo -i
export XDG_RUNTIME_DIR=/run/user/1000
# Play the video we've just encoded
gst-launch-1.0 -v filesrc location=/home/ubuntu/test-h264.mp4 ! \
  parsebin ! v4l2h264dec ! \
  v4l2convert output-io-mode=5 ! video/x-raw,width=720,height=480 ! \
  waylandsink
You might want to change the parameter location=/home/ubuntu/test-h264.mp4.
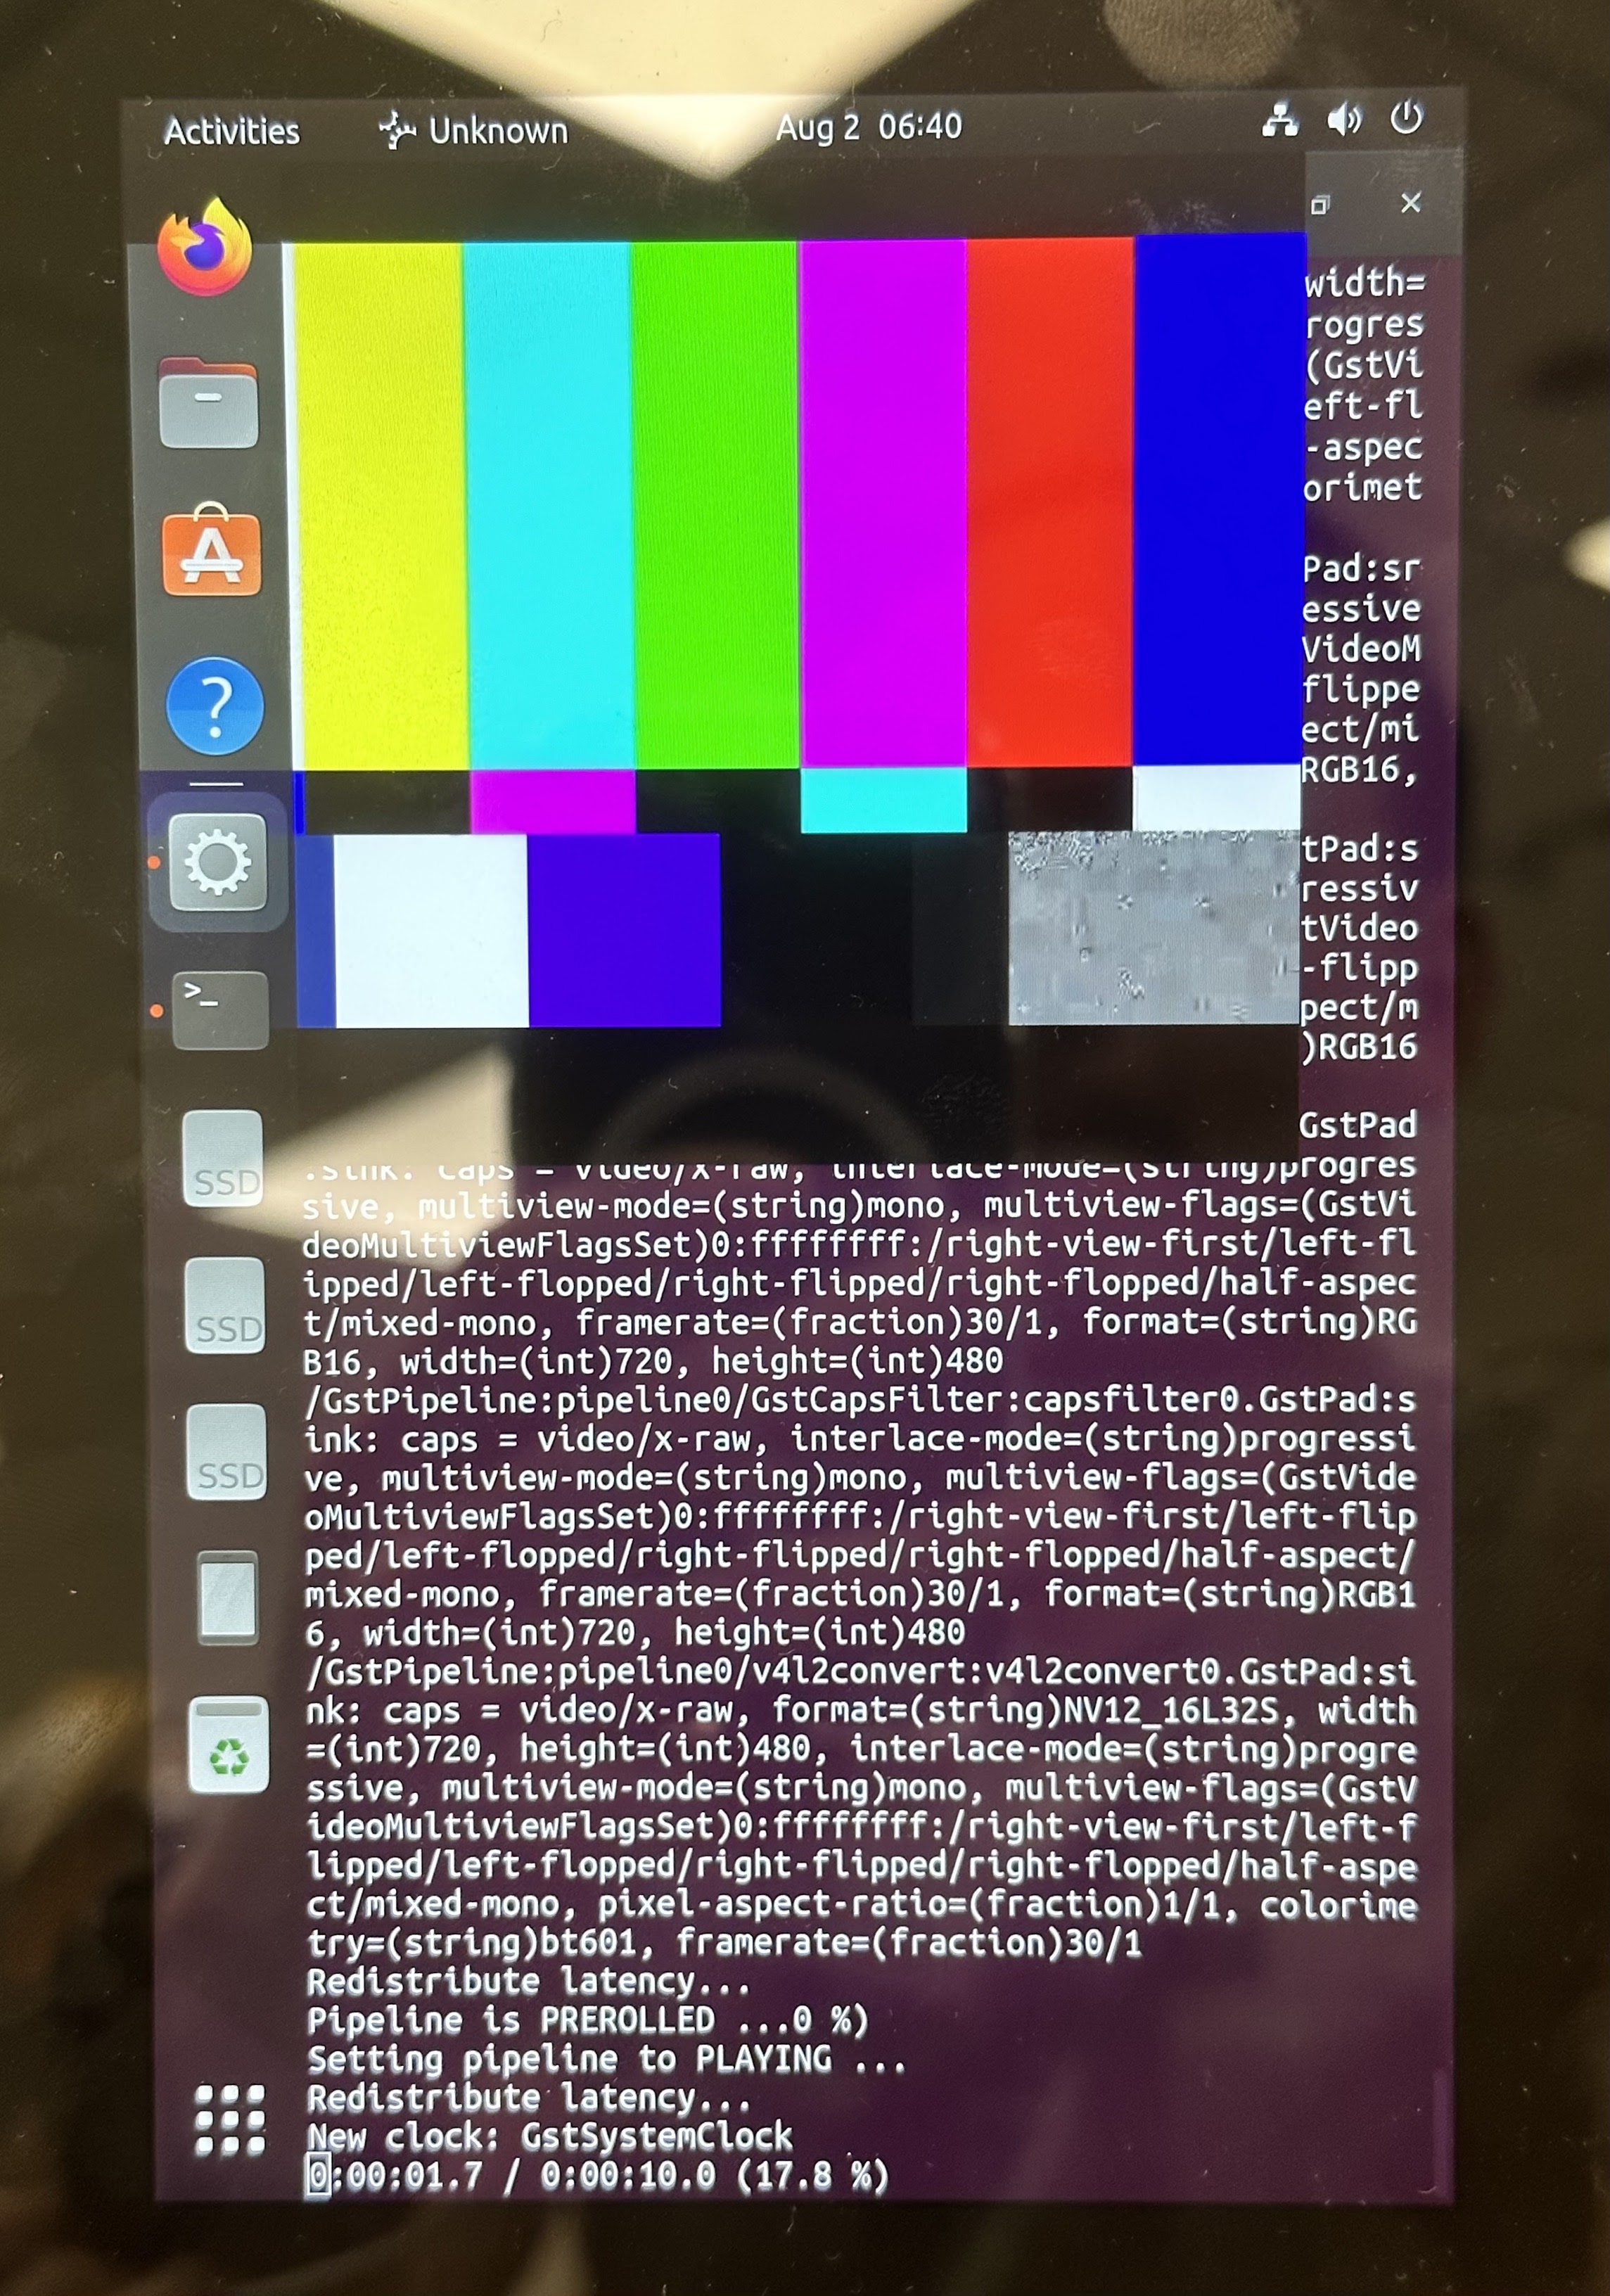
After executing the command, a video surface should appear on the Ubuntu desktop:

Video playback with GStreamer waylandsink
Hardware Video Decoder Usage Example with GStreamer (Ubuntu Server)
For video playback on Ubuntu Server, which does not have a desktop environment, we need to access the DRM/KMS directly
without a Wayland compositor. To do so, we replace the waylandsink element with kmssink.
Note that you need root privileges to access the DRM display device.
# Stop wayland compositor and GUI to release the DRM display device
sudo systemctl isolate multi-user.target

# Play the video we've just encoded
# Note that you need root privileges to access the DRM display device
sudo gst-launch-1.0 -v filesrc location=/home/ubuntu/test-h264.mp4 ! parsebin ! v4l2h264dec ! \
  v4l2convert output-io-mode=5 ! video/x-raw,width=720,height=480 ! \
  kmssink connector-id=32 driver-name="mediatek"
You might need to change the parameter connector-id=32 to the actual display connector id reported by
the modeprint mediatek command line utility. In the example below, the connector id for DSI is 32
while the connector id for HDMI is 34:
ubuntu@mtk-genio:~modeprint mediatek
Starting test
Resources

count_connectors : 2
count_encoders   : 2
count_crtcs      : 2
count_fbs        : 0

Connector: DSI-1
        id             : 32
        ...
Mode: "1200x1920" 1200x1920 60
Connector: HDMI-A-1
        id             : 34
        ...
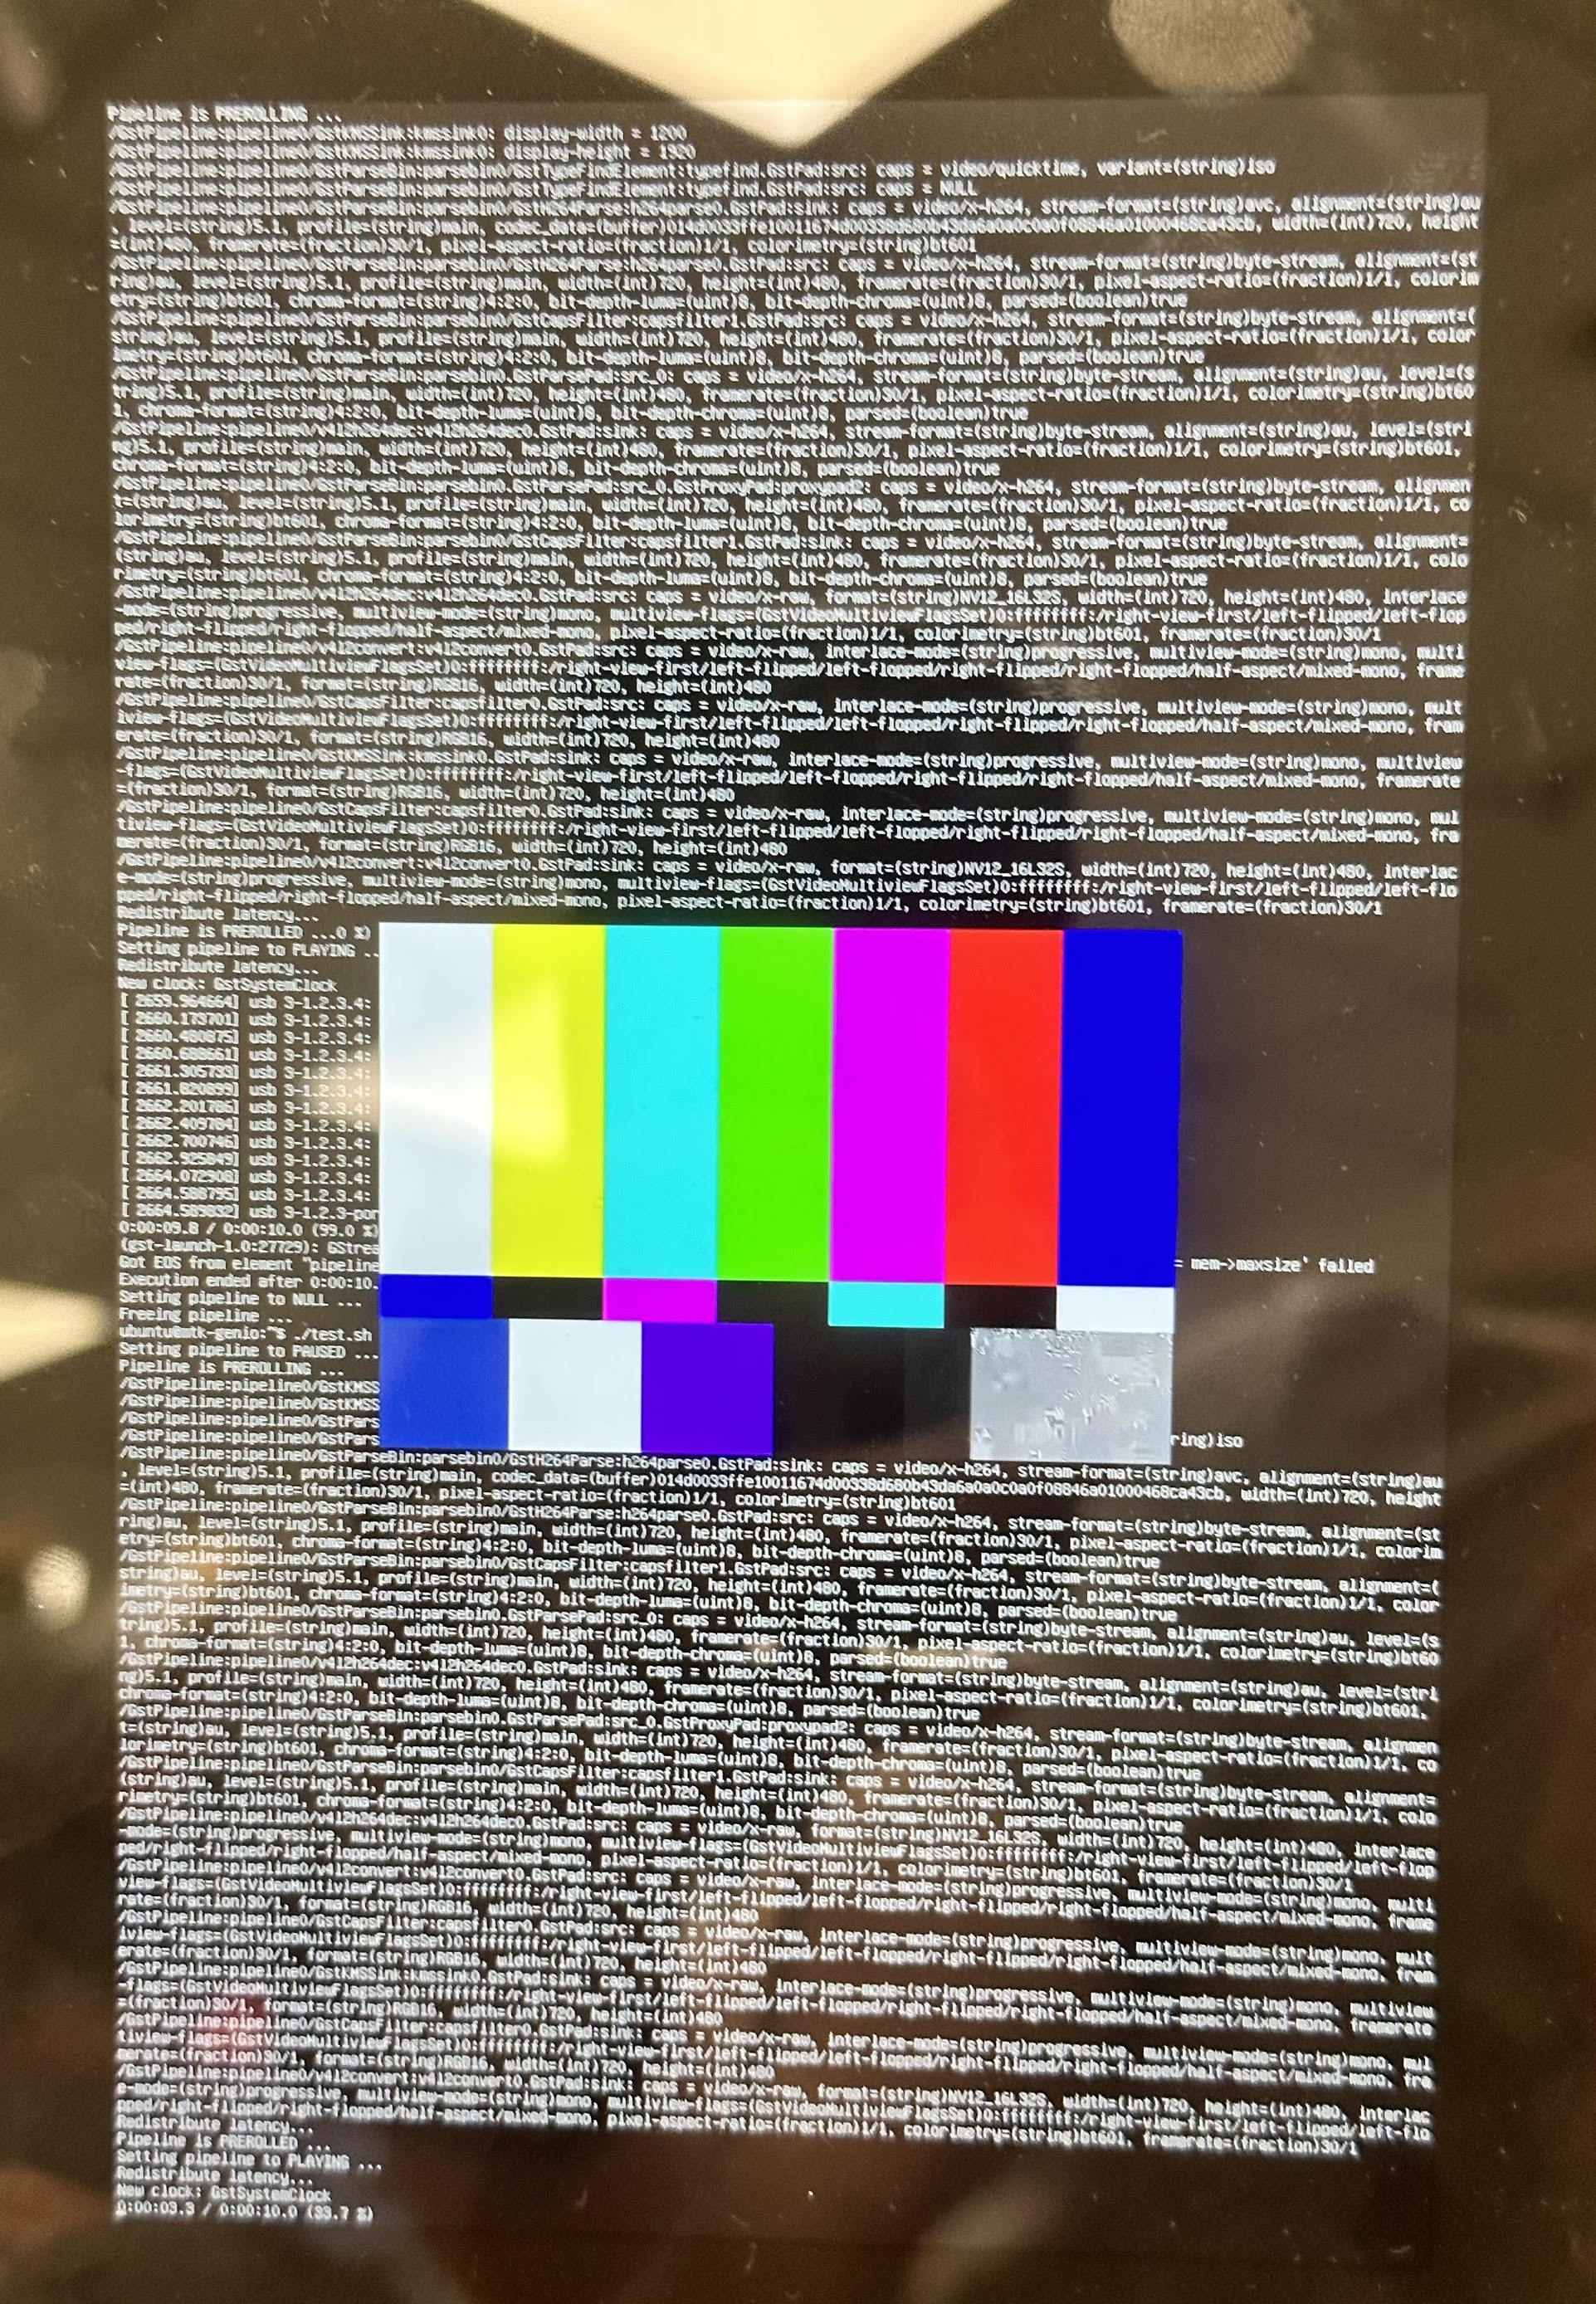
After executing the command, you should see a video rectangle in the display that you’ve assigned:

Video playback with GStreamer kmssink
This wraps up the installation of hardware video codec packages on the Genio platform. The ppa:mediatek-genio/genio-public is publicly available and you do not need a Launchpad account to install these packages.
The following sections show how to subscribe and install the access-controlled private packages.
Use glvideomixer element in Ubuntu on Genio
The default API used in GStreamer glvideomixer element is OpenGL, although OpenGL ES is also provided. Ubuntu on Genio supports OpenGL ES but not the OpenGL API.
So, to use glvideomixer elements, you need to configure the GStreamer to use OpenGL ES and EGL in OpenGL-related elements by setting these environment variables:
export GST_GL_API=gles2
export GST_GL_PLATFORM=egl
# Launch your GStreamer pipeline
Failing to set the API and platform variables may cause glvideomixer fail to bind to OpenGL API and the GStreamer pipeline won’t connect properly.
For other OpenGL-related environment variables, refer to: https://github.com/GStreamer/gst-plugins-base/blob/master/gst-libs/gst/gl/gstglcontext.c
Recording HDMI-RX Audio in Ubuntu on Genio
The Genio 1200 EVK supports HDMI-RX. If you want to record audio data from the HDMI-RX, please adjust the audio muxing configuration with the following commands:
amixer -c 0 cset name='MULTI_IN1_MUX' HDMI_RX_I2S
For other HDMI-RX usage guides, please refer to the IoT Yocto BSP guide .